How to build a document scanner with OpenCV ?
| Created | |
|---|---|
| Tags | |
| URL | https://dvic.devinci.fr/en/resource/tutorial/scanner-opencv/ |
axel_thevenotmatrix-transformation-3dbillard-interactifinnovation
Designing a manual document scanner can be done in a very simple way using python and OpenCV.
We need to use the numpy and OpenCV libraries. If they are not already setup, just run the following lines at the command prompt (powershell, bash...).
$ pip install numpy
$ pip install opencv-python
Step 1: Create a trapezoid to define the transformation
First of all, a trapezoid has to be created, whose extremities will be moved in the image to surround the document to be scanned.
import numpy as np

class Trapezoid:

    def __init__(self, img_size, r=5, color=(143, 149, 47),
                bottom_color=(196, 196, 196), border_color=(255, 0, 135)):
        # Initialize the contours
        self.contours = np.array([[[0 + r, 0 + r]],
                               [[0 + r, img_size[1] - r]],
                               [[img_size[0] - r, img_size[1] - r]],
                               [[img_size[0] - r, 0 + r]]])

        # Initialize the radius of the borders
        self.r = r
        # Initialize the colors of the trapezoid
        self.color = color
        self.bottom_color = bottom_color
        self.border_color = border_color

    def get_border_index(self, coord):
        # A border is return if the coordinates are in its radius
        for i, b in enumerate(self.contours[:, 0, :]):
            dist = sum([(b[i] - x) ** 2 for i, x in enumerate(coord)]) ** 0.5
            if  dist < self.r:
                return i
        # If no border, return None
        return None

    def set_border(self, border_index, coord):
        self.contours[border_index, 0, :] = coord
The trapeze is in the form of an object. It is defined by its corners, which therefore define its contour. We then define a circle radius to display the corners of the trapezoid, which we will be able to be dragged with the mouse in the interface. Finally, colors are defined. The bottom_color will be used to visualize what is the bottom of the document in the image to differentiate it from the other edges.
Step 2 : Create a Scanner class
We can now begin the design of the scanner, which will be completed during this tutorial.This class will allow us to interface with OpenCV. We will be able to drag and drop the corners of the trapezoid in order to delimit the document to be scanned.
import cv2
import numpy as np

class Scanner():

    def __init__(self, input_path, output_path):
        self.input = cv2.imread(input_path)
        self.output_path = output_path
        # get the shape and size of the input
        self.shape = self.input.shape[:-1]
        self.size = tuple(list(self.shape)[::-1])

        # create a trapezoid to drag and drop and its perspective matrix
        self.M = None
        self.trapezoid = Trapezoid(self.size,
                                r=min(self.shape) // 100 + 2,
                                color=(153, 153, 153),
                                border_color=(255, 0, 136),
                                bottom_color=(143, 149, 47))

        # Initialize the opencv window
        cv2.namedWindow('Rendering', cv2.WINDOW_NORMAL)
        cv2.setMouseCallback('Rendering', self.drag_and_drop_border)

        # to remember wich border is dragged if exists
        self.border_dragged = None
So we create the class constructor. We import the image, the backup path. Note that the variables self.shape and self.size are the same but with their values in opposite directions. Indeed OpenCV treats images with a size format (width, height) while numpy treats them with a format (height, width).

A trapezoid and a self.M. perspective matrix are then instantiated. This matrix will allow the image to be distorted for scanning the document.
Finally we build an OpenCV window and a variable to remember the corner entered for the drag and drop interface. cv2.setMouseCallback allows to call a function at each mouse event on the window. The function self.drag_and_drop_border must therefore be defined.
Step 3 : Drag and Drop the trapezoid in the image
Then it is time for drag and drop. First we start by displaying the trapeze on the image. Then we will create a function that will be called at each mouse event.
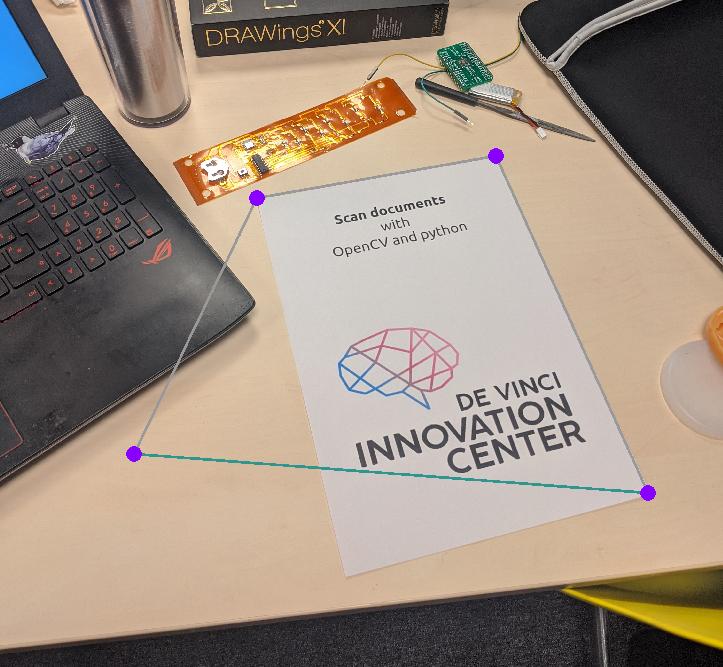
There is nothing important to note in the function to display the trapezoid except that the bottom side of the document is marked for visual reference.
To allow drag and drop of the corners of this trapezoid, each time the left mouse button is pressed, we will check if these coordinates are within the circle defining a corner. We can then move it with the mouse until we release the click.
    def draw_trapezoid(self, img):
        # draw the contours of the trapezoid
        cv2.drawContours(img, [self.trapezoid.contours], -1,
                       self.trapezoid.color, self.trapezoid.r // 3)
        # draw its bottom
        cv2.drawContours(img, [self.trapezoid.contours[1:3]], -1,
                       self.trapezoid.bottom_color, self.trapezoid.r // 3)
        # Draw the border of the trapezoid as circles
        for x, y in self.trapezoid.contours[:, 0, :]:
            cv2.circle(img, (x, y), self.trapezoid.r,
                      self.trapezoid.border_color, cv2.FILLED)
        return img

    def drag_and_drop_border(self, event, x, y, flags, param):
        # If the left click is pressed, get the border to drag
        if event == cv2.EVENT_LBUTTONDOWN:
            # Get the selected border if exists
            self.border_dragged = self.trapezoid.get_border_index((x, y))

        # If the mouse is moving while dragging a border, set its new positionAxel THEVENOT
        elif event == cv2.EVENT_MOUSEMOVE and self.border_dragged is not None:
                self.trapezoid.set_border(self.border_dragged, (x, y))

        # If the left click is released
        elif event == cv2.EVENT_LBUTTONUP:
            # Remove from memory the selected border
            self.border_dragged = None
Etape 4 : Matrice de perspective
Now we have to create the perspective matrix, which allows us to switch from the coordinates of the input image to the coordinates of the output image. If you want to know more about transformation matrices, I invite you to visit my tutorial on this subject.
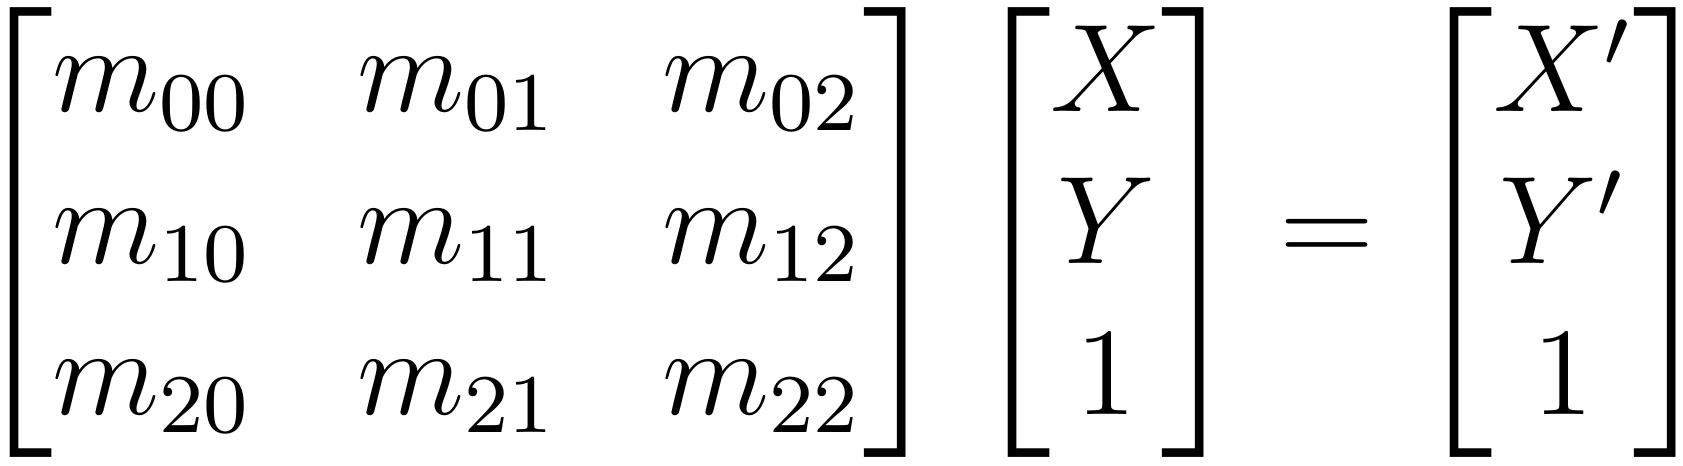
With OpenCV, it's simpler. We just need to know the coordinates of the corners of the source image (here, the trapezoid) and the coordinates of the destination image (the output image in the format of the input image).
    def actualize_perspective_matrices(self):
        # get the source points (trapezoid)
        src_pts = self.trapezoid.contours[:, 0].astype(np.float32)

        # set the destination points to have the perspective output image
        h, w = self.shape
        dst_pts = np.array([[0, 0],
                          [0, h - 1],
                          [w - 1, h - 1],
                          [w - 1, 0]], dtype="float32")

        # compute the perspective transform matrices
        self.M = cv2.getPerspectiveTransform(src_pts, dst_pts)
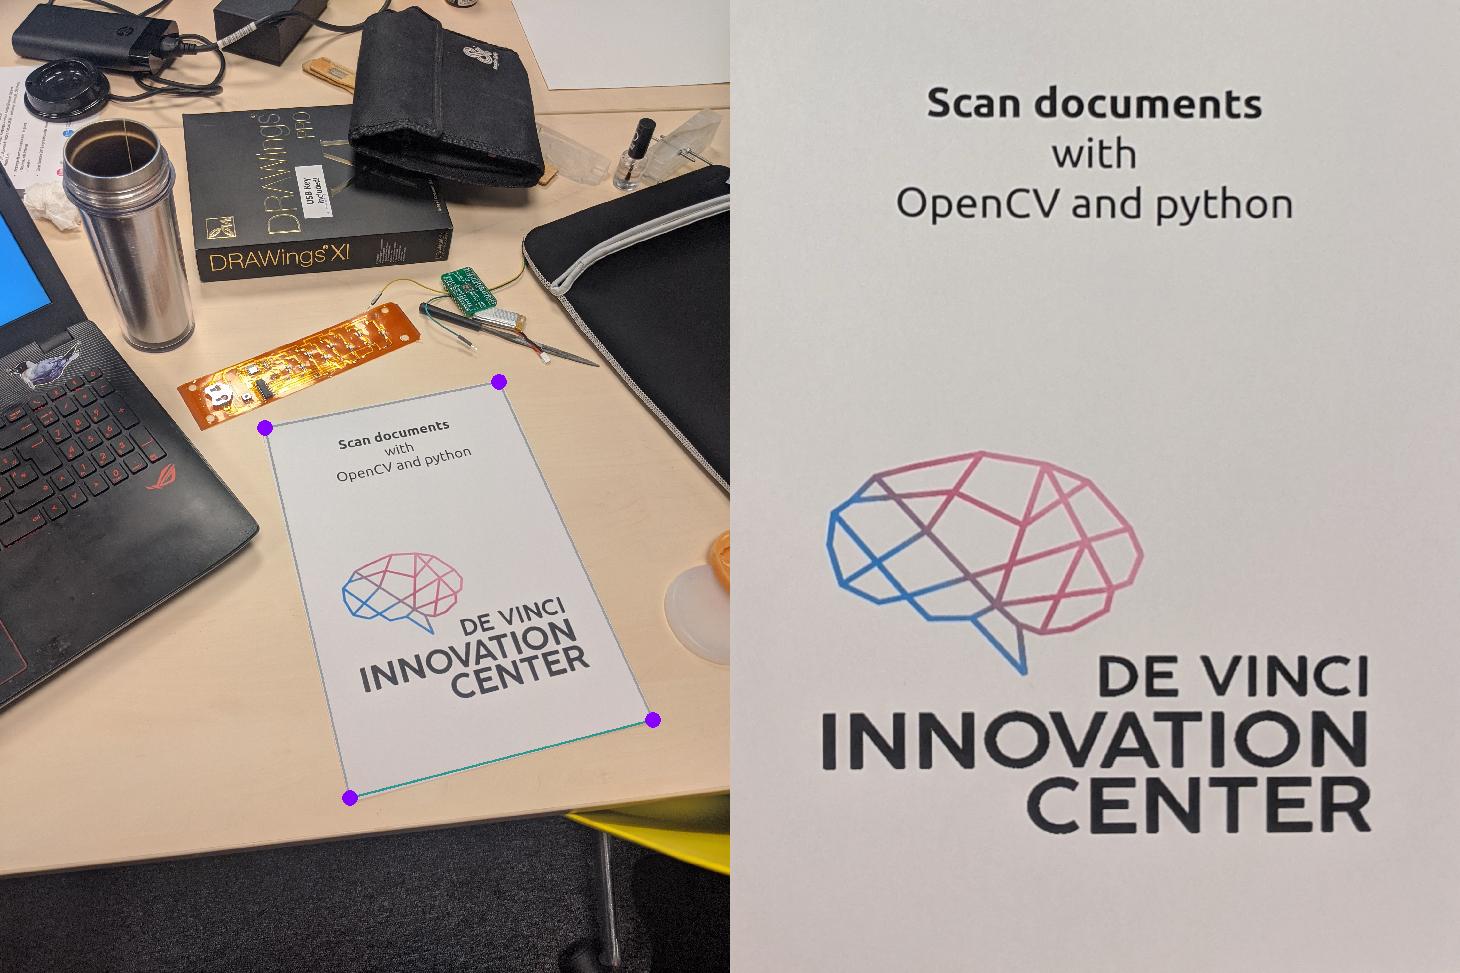
The interface can now be activated in real time by updating the perspective matrix at each step.
    def run(self):
        while True:
            self.actualize_perspective_matrices()

            # get the output image according to the perspective transformation
            img_output = cv2.warpPerspective(self.input, self.M, self.size)

            # draw current state of the trapezoid
            img_input = self.draw_trapezoid(self.input.copy())
            # Display until the 'Enter' key is pressed
            cv2.imshow('Rendering', np.hstack((img_input, img_output)))
            if cv2.waitKey(1) & 0xFF == 13:
                break

        # Save the image and exit the process
        cv2.imwrite(self.output_path, img_output)
        cv2.destroyAllWindows()
Step Bonus : Get a better output
Because it is free, you might as well improve the image quality a little. Just pass the output image through this function in the loop of the run() function.
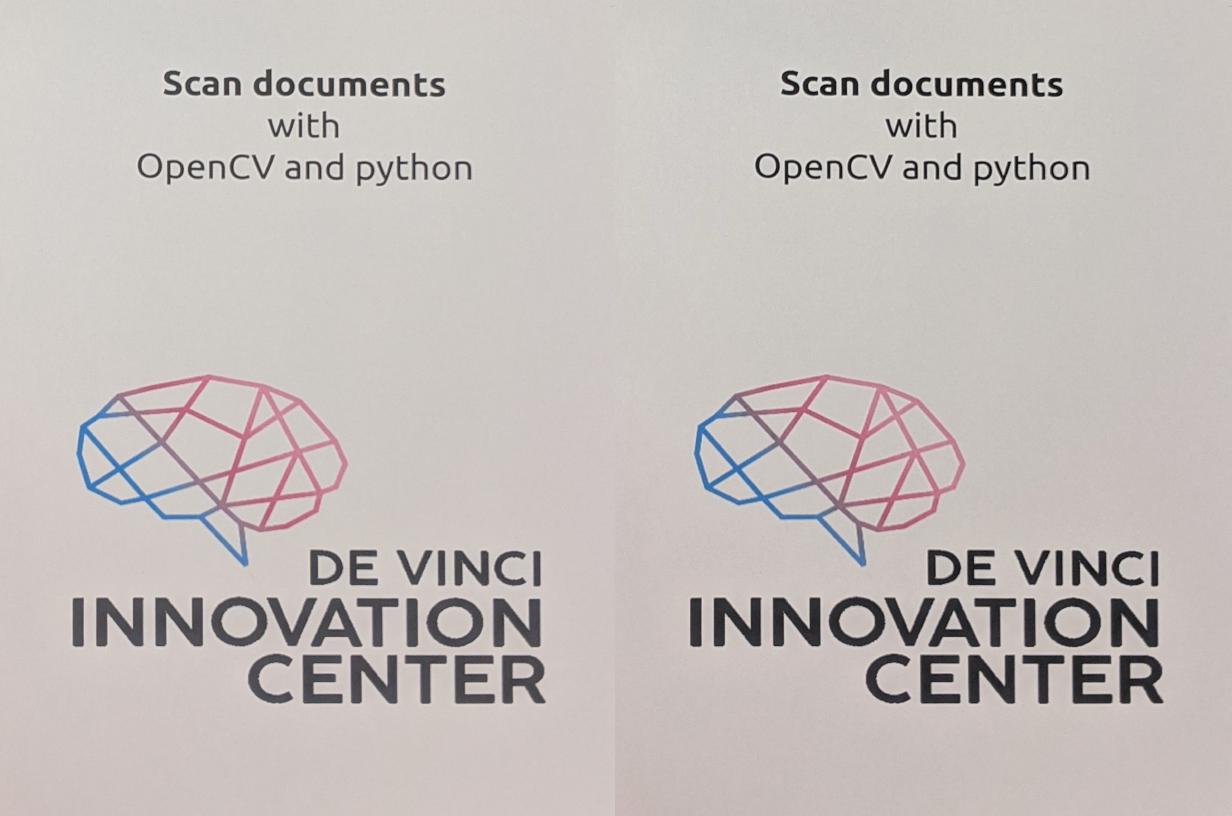
    def bonus(self, img):
        """Make the output better"""
        hsv = cv2.cvtColor(img, cv2.COLOR_BGR2HSV)
        value = hsv[..., 2]
        value = (value - np.min(value)) / (np.max(value) - np.min(value))
        hsv[..., 2] = (value * 255).astype(np.uint8)
        return cv2.cvtColor(hsv, cv2.COLOR_HSV2BGR)
Step 5 : Run the program
We can add these last lines and run the script from the bash.
import os
import argparse

# Argument parser
ap = argparse.ArgumentParser()
ap.add_argument('-i', '--input', type=str,
                help="Input image")
ap.add_argument('-o', '--output', type=str, default=None,
                help='Output image : default {Input image + "_scanned"}')
args = ap.parse_args()

if __name__ == '__main__':

    if args.input is None:
        print('No input image')
    elif not os.path.exists(args.input):
        print('The input image path does not exists')
    else:
        if args.output is None:
            path, format = args.input.split('.')
            path += '_scanned'
            args.output = f'{path}.{format}'

    scanner = Scanner(args.input, args.output)
    scanner.run()
Now all that remains is to test !
$ python scanner.py -i picture.jpg